DMG1083 driver boards
I’ve designed a driver board for DMG1083 LED tiles from digiLED. The board plugs into a tile and lets you control it from an attached computer, via a simple USB interface.
You can get the source code and board design files from the led-panel-zone repository. Alternatively, I’m currently taking pre-orders for these boards as part of a group buy; read on for more information below!
Detailed description
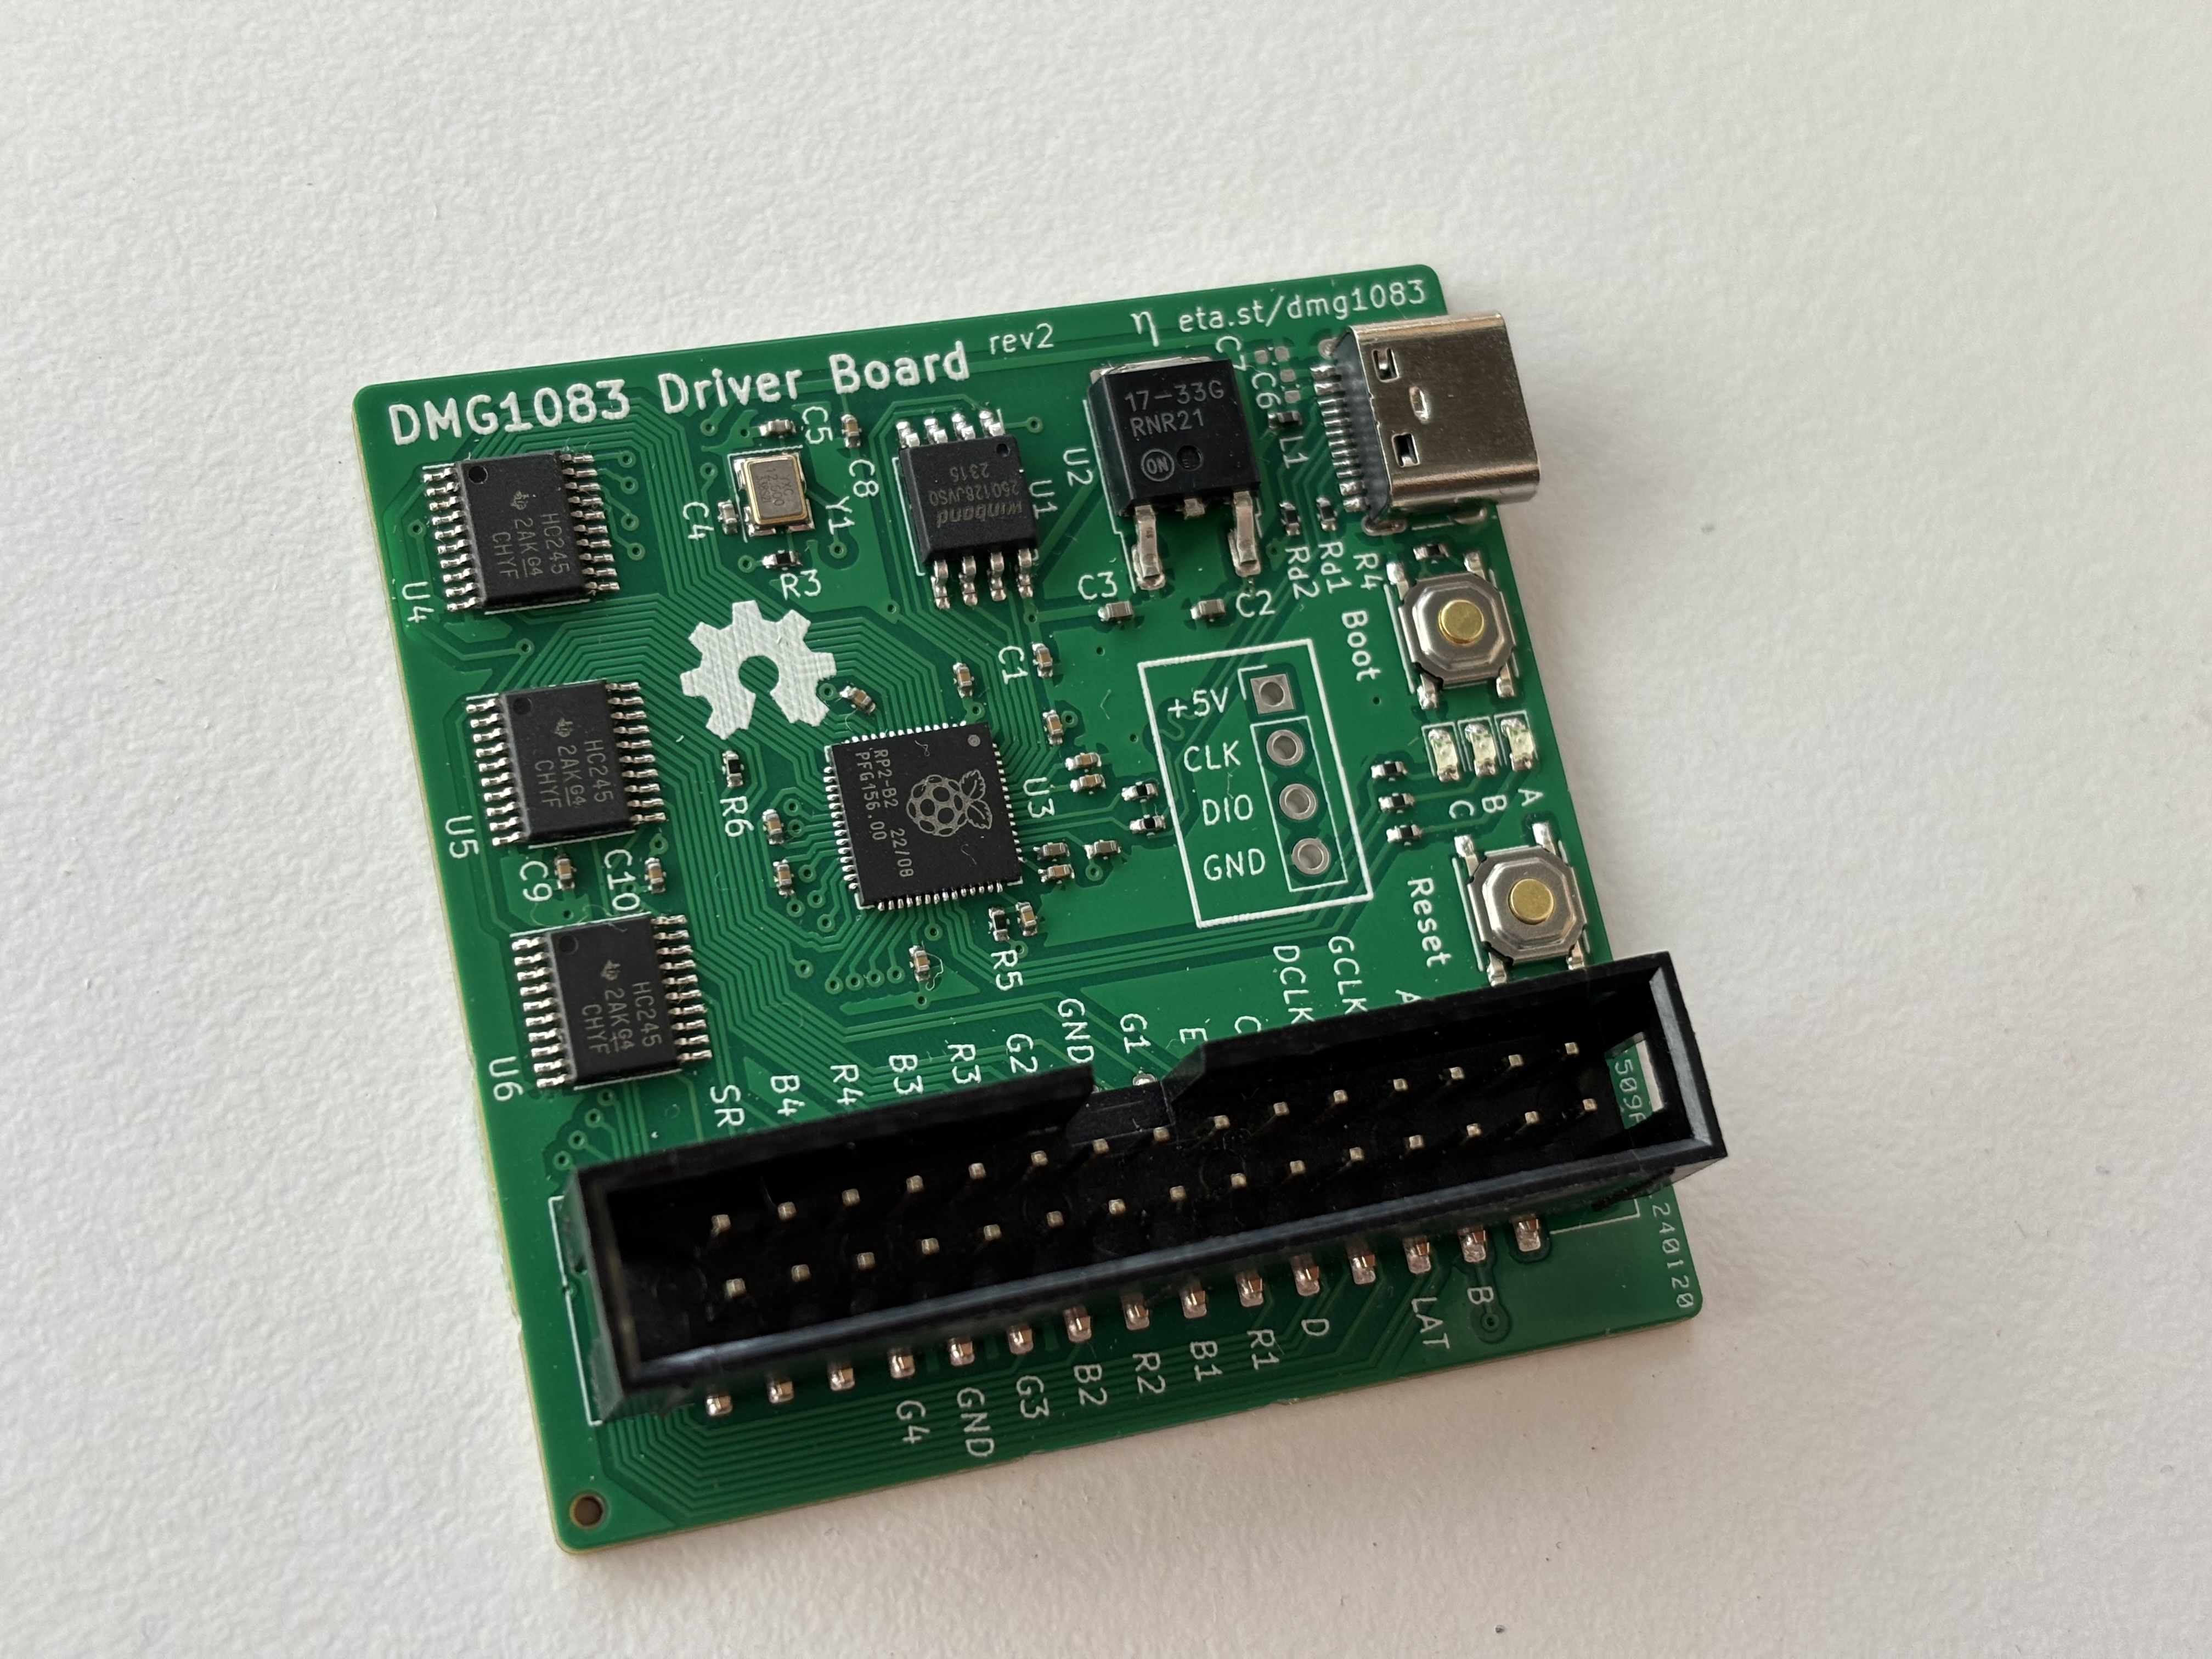
The DMG1083 driver board features a USB-C connector for use with a computer, and a 30-pin connector that matches the connector on the back of the DMG1083 panel. The board accepts 78 by 78 pixel sRGB images in QOI format over a custom USB protocol, which it displays on the attached panel by emitting the signals necessary to do so.
These boards are development boards; to get the most out of them, you’ll need to write your own code to talk to them. You can use the reference implementation and the USB protocol docs to help.
Each board can only drive one panel. If you want to drive multiple as part of a video wall, you’ll need multiple boards plugged into a computer, and you’ll need to write the code to do that yourself.
The driver boards do not power the panel in any way. The panels have a 4-pin JST VH header for power (see the panel docs), which you’ll need to connect a 5V power supply to.
Technical specifications
- 1x RP2040 microcontroller
- 1x W25Q128JVS flash chip with 16 MB of flash storage
- USB 1.0 Full Speed connection to computer via USB-C receptacle
- 1x 30-pin connector compatible with DMG1083 LED tiles
- 3x red LEDs for info/debug purposes
If you buy a board from me, it’ll come pre-installed with the usb2panel
open-source firmware. You can reprogram it at home by holding down Boot when connecting the board and copying a
firmware image to the USB drive that appears; there’s also a space to solder on a 4-pin programming header for
faster development.
Order now!
If you’re interested in buying some, fill out this form and I’ll get back to you.